Hard edges
Continuing on from my previous post on bevels, let’s discuss some more ways to maintain hard edges when using the subdivision surface modifier.
The subdivision surface modifier takes the faces of your geometry and splits them one or more times to give you denser geometry.
Blender supplies two algorithms for this:
-
Simple: This subdivides the faces but doesn’t (at least not without caveats that I don’t care to go into) smooth the results at all.
-
Catmull-Clark: This both subdivides the faces and smooths the resulting mesh according to an algorithm designed to create an aesthetically pleasing result. Without anything else influencing the result, this turns the default cube into a sphere. Below you can see the default cube with different types and levels of subdivision applied.
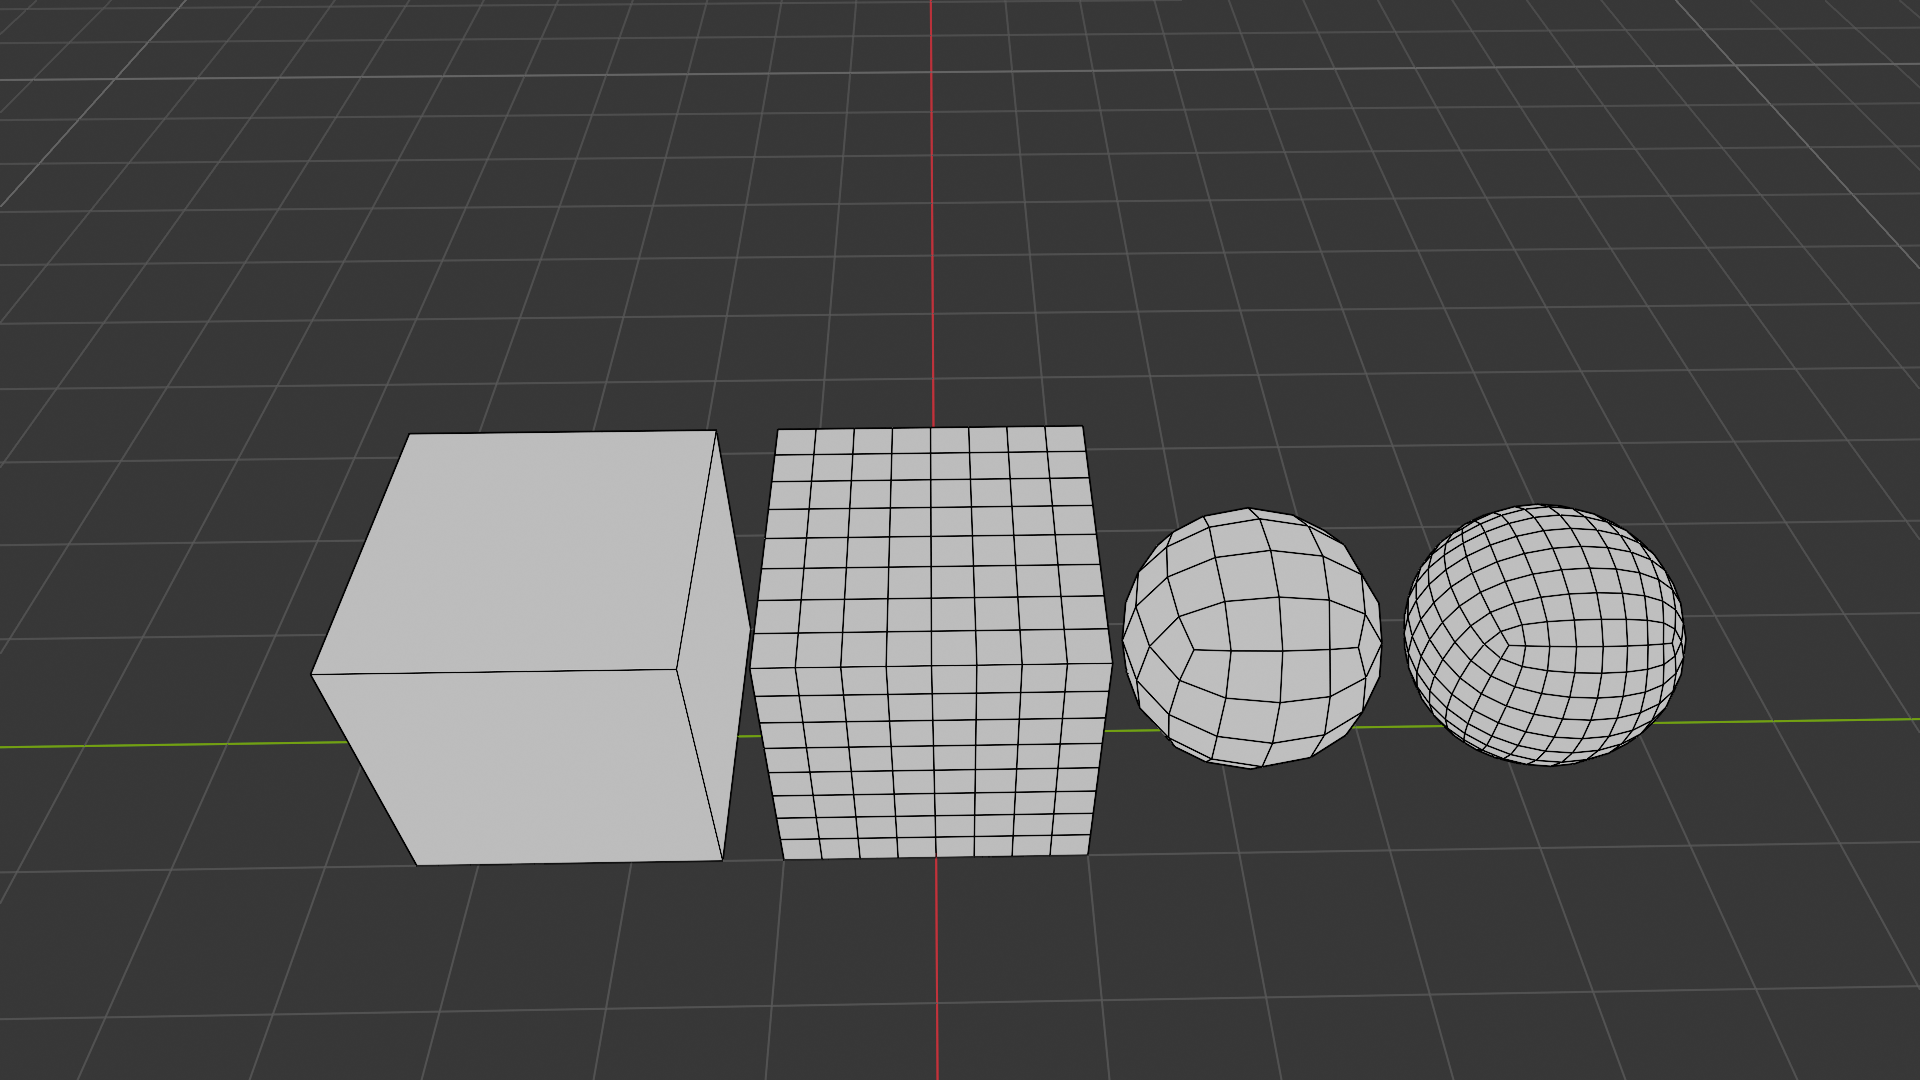
The most common reason for using the subdivision surface modifier is to allow you to create your base mesh with simpler topology and then have the final result smoothed to create appealing curvature. This is often exponentially simpler than trying to work with curves in the original mesh.
The smoothing is applied uniformly by default, as shown above. We need a method to control how it is applied to get the final shape we want.
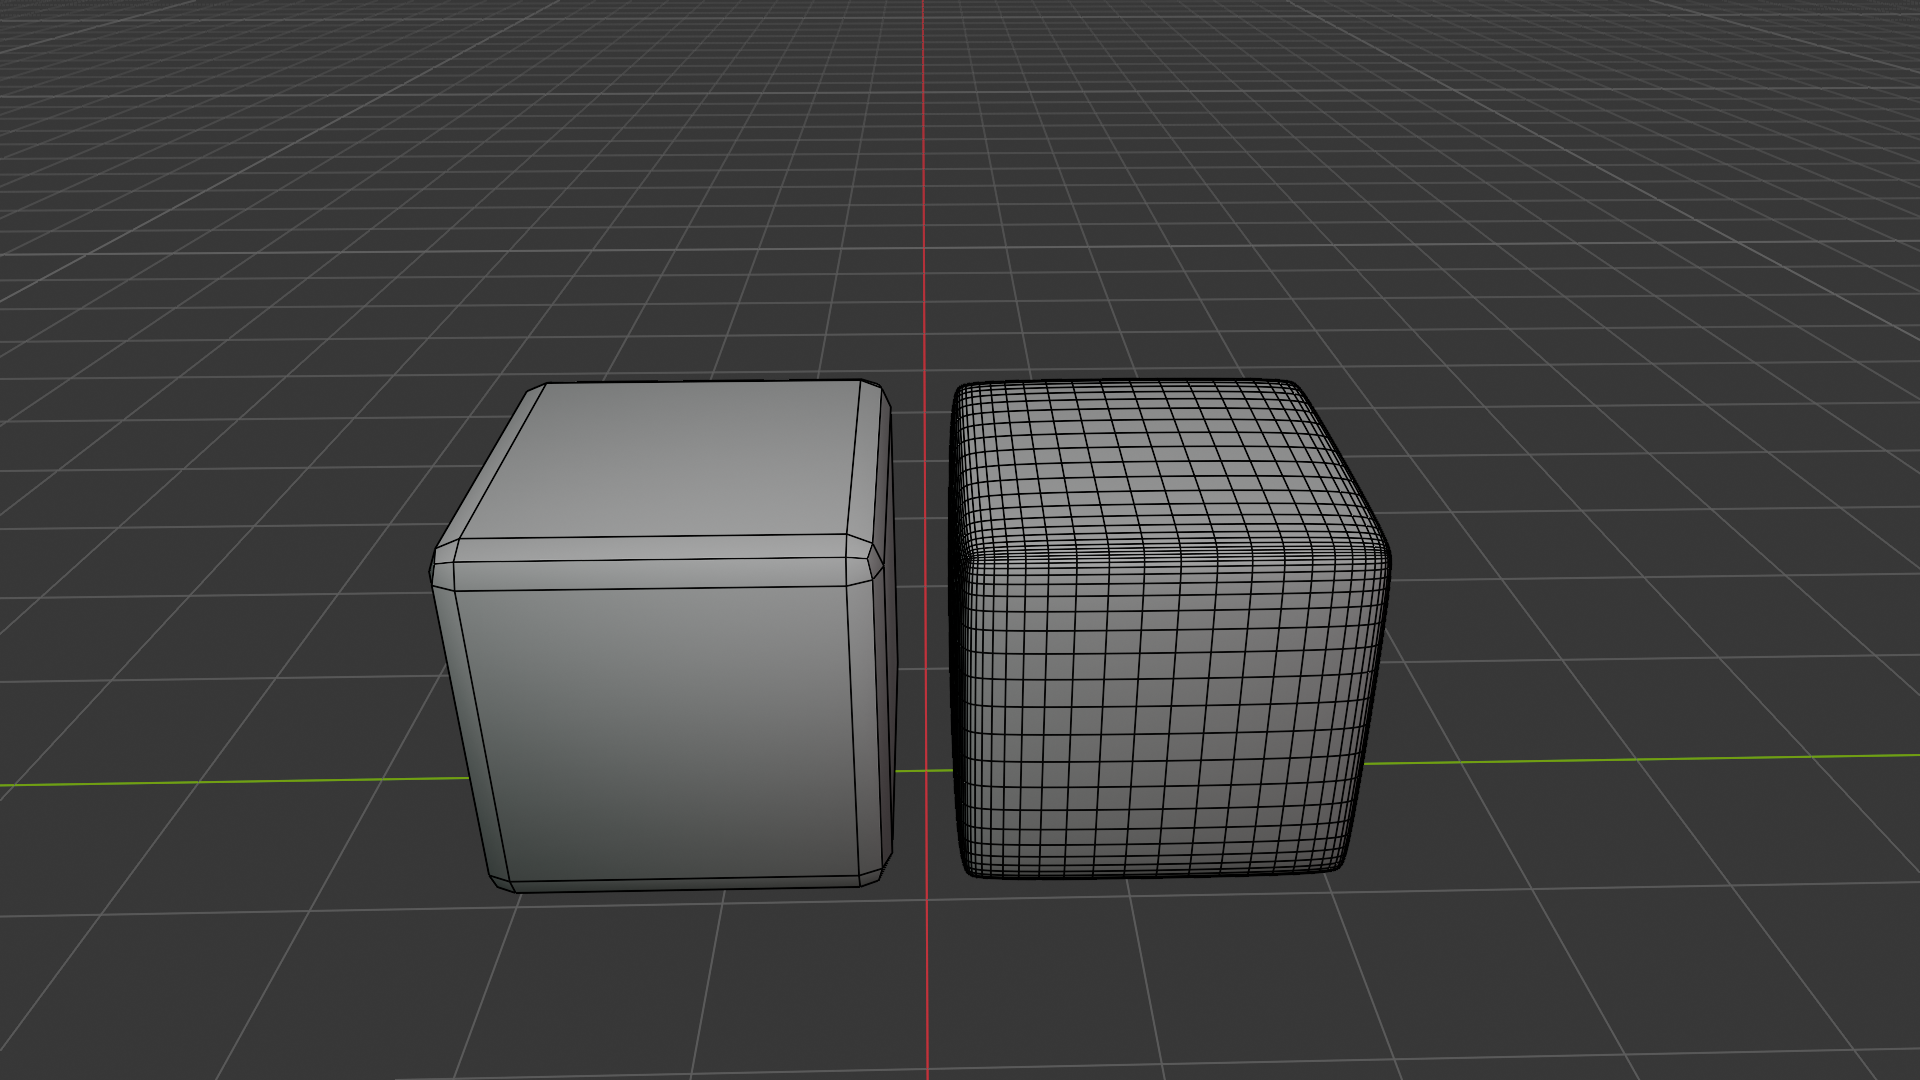
One easy way to do this is to add a small bevel to the edges you want to keep sharp. This creates denser geometry around the edges. The smoothing algorithm then affects the small faces next to the edges rather than the larger faces you want to remain flat.
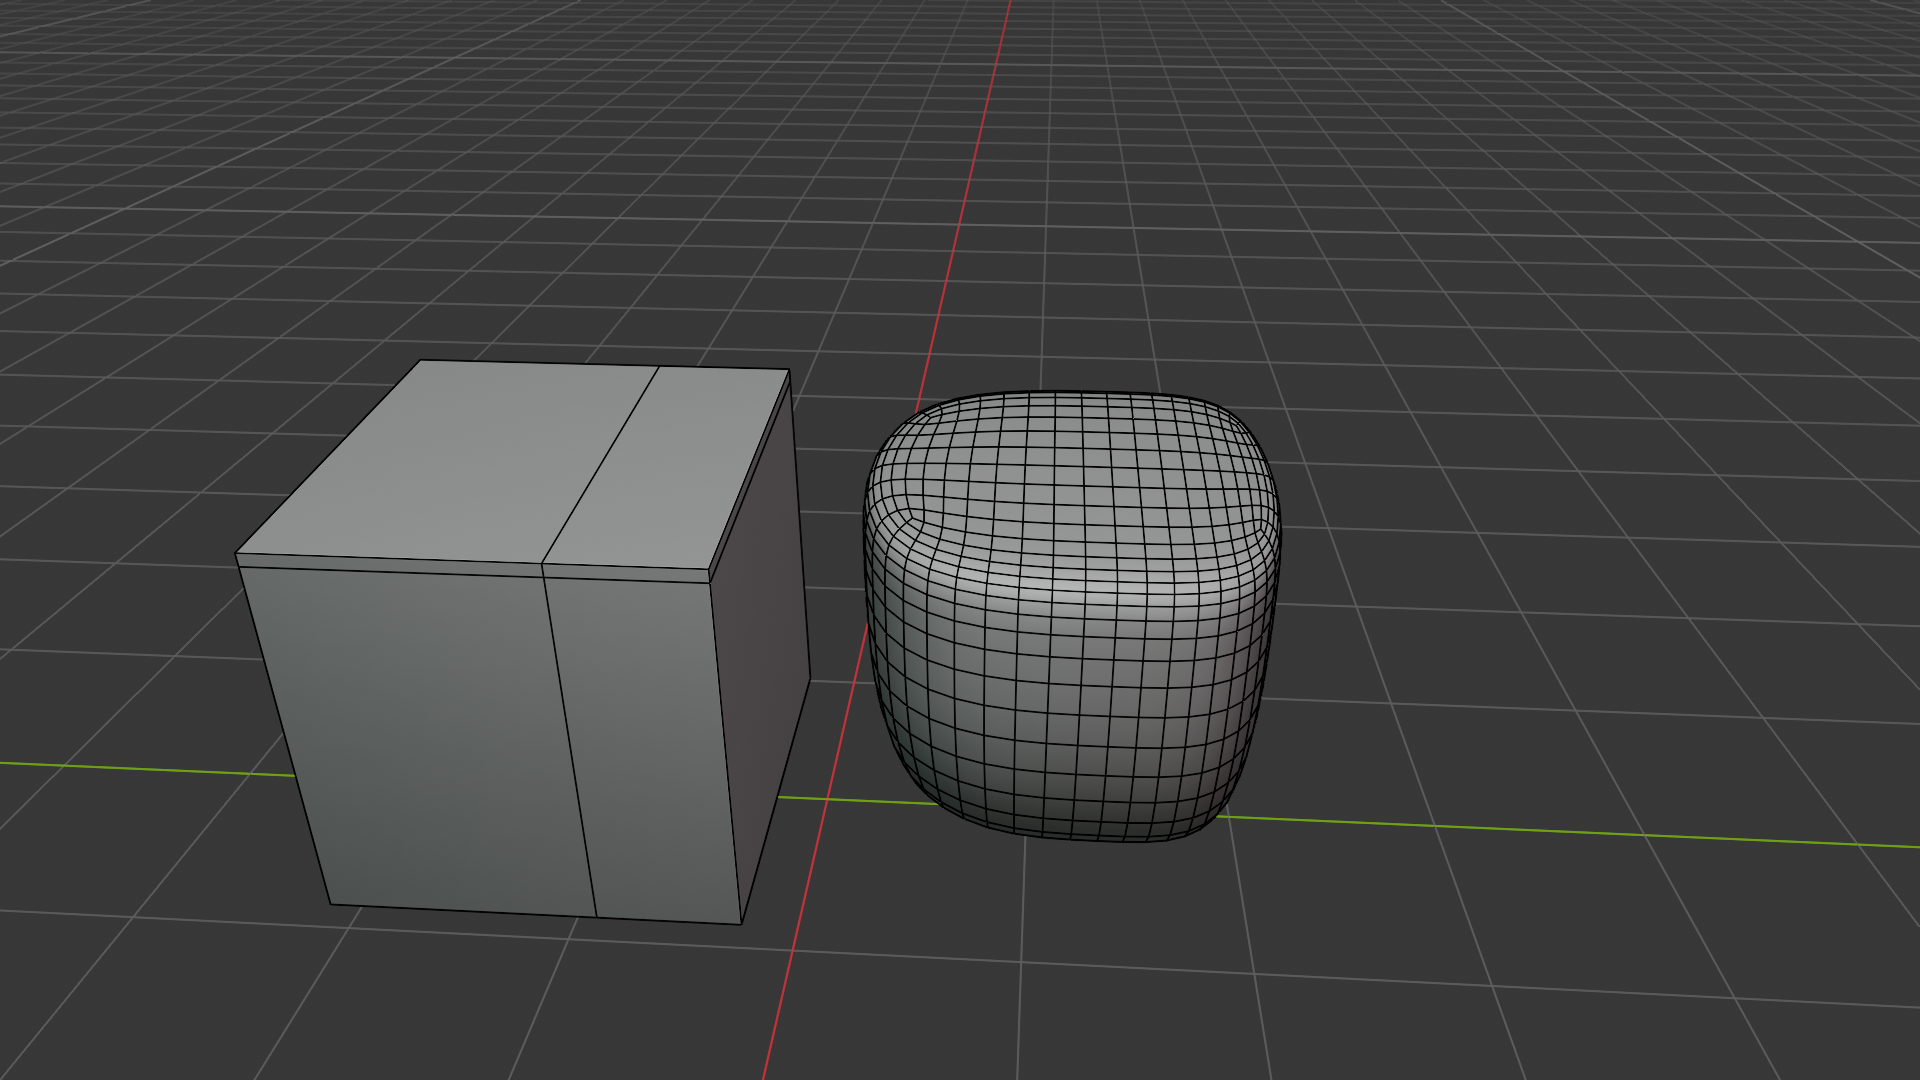
The same strategy can be applied with a little more control using support loops. By moving a supporting edge closer to the sharp edge, you can control how localized the smoothing is. This lets you keep the edge rounder or sharper as desired.
The disadvantage of using support loops is that they require you to edit the original mesh, reintroducing some of the complexity we’re trying to avoid in the first place. There’s another solution that can often give a good result. Blender allows you to add a crease data attribute between 0 and 1 to edges. These attributes will then be used by the subdivision surface modifier to control how the smoothing occurs, with a 0 meaning no influence over the smoothing and a 1 meaning keep the edge completely sharp.
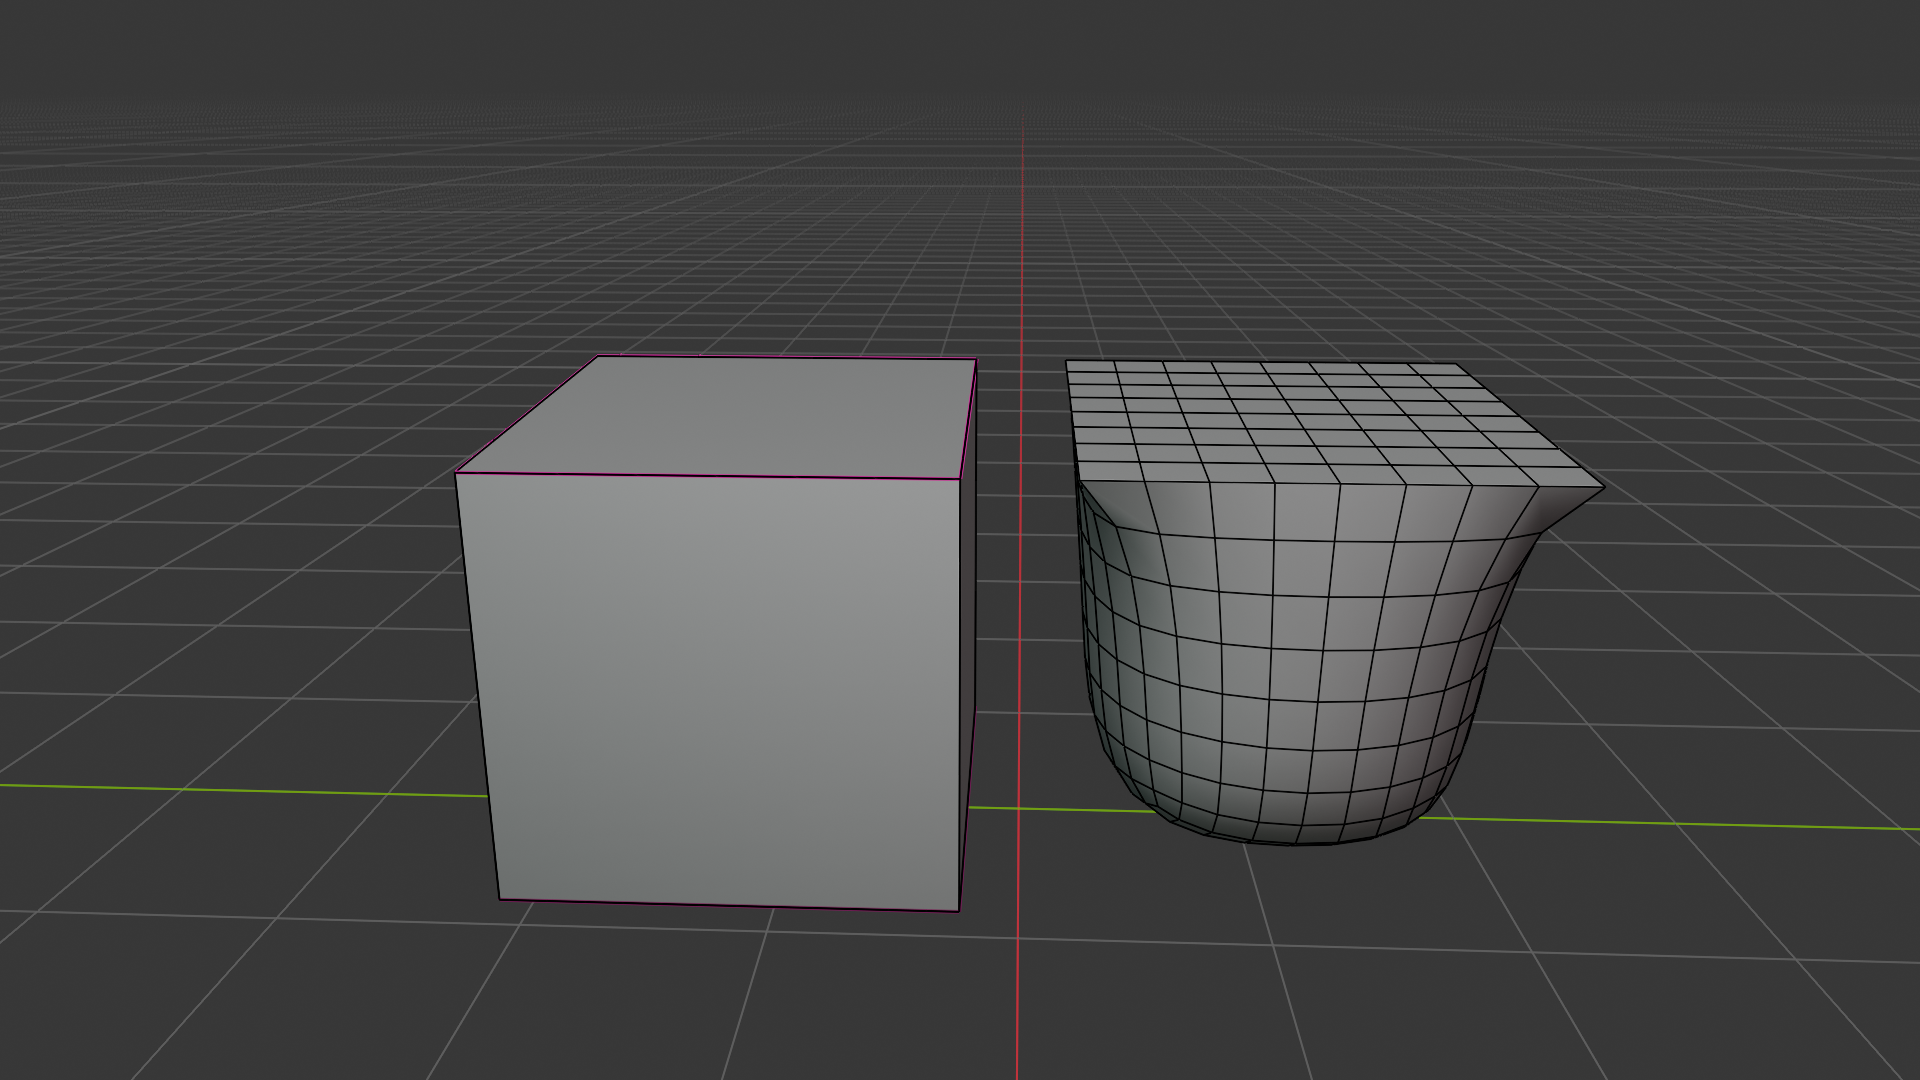
On the face of it (no pun intended), the crease method would seem to be ideal, giving us control over the hardness of edges without the downside of complicating the base mesh. The reality is more complicated, and it requires judgment to choose the appropriate method for any given situation.
For simpler edges, creases are certainly a good option. Where you need even transitions across a larger curve, they can be more difficult, as they often cause pinching. Support loops or a combination of support loops and creases are likely a better fit here.
Similarly, if you want a lot of control over the profile of an edge, you’ll probably have a much easier time specifying it with a bevel than with support loops or creases.
A final point to mention about creases is that they’re not universally supported by all export formats. If exporting to other software, you may not be able to rely on creases at all.
The reality is that you will most likely need to know and use a combination of all three techniques depending on the project and specific situation. Apply different techniques to see which gets you the effect you want with the least amount of effort.
You may also not need the subdivision surface modifier at all depending on the model. Often, it’s more intuitive to just modify the mesh directly for simpler objects.